Hi there folks! What have you been upto this week? I sure hope that it was colorful, interesting and lovely. Even if it was not, don’t worry. Life is holding something pleasant & nice for you just around the next corner.
So this time, to spice things up, I’m going to show you how to change the default boring purple & noisy login screen background that you get while logging into Ubuntu 17.10.
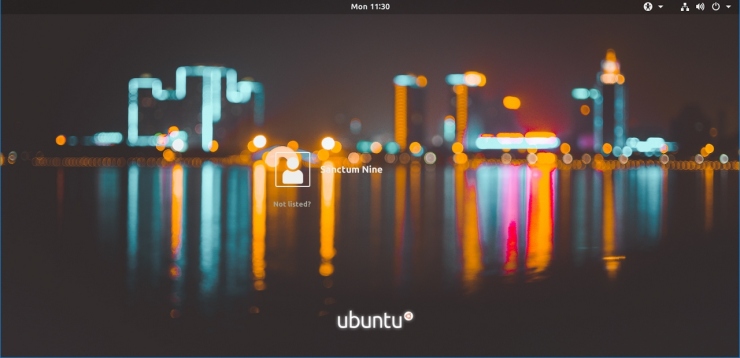
Recognize this?

Yup, the old & boring login screen. Let’s turn that into something hot.
Requirement
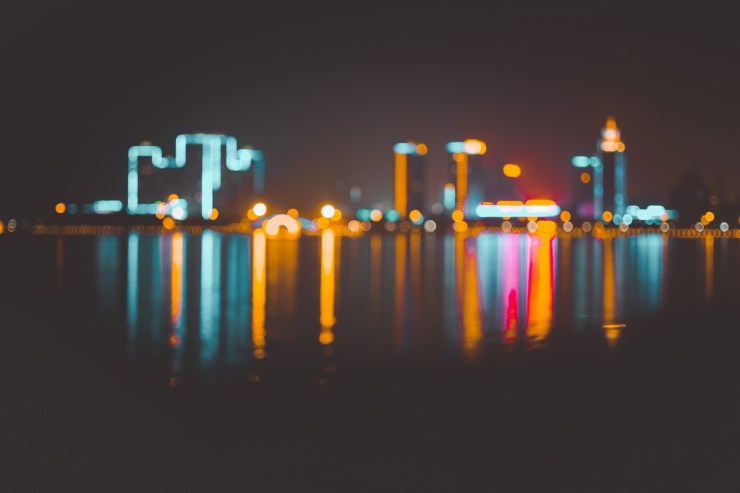
First, download the image that you want to use as the login screen background. For example, here I went to Unsplash and downloaded this image:
Getting things done
The next step is to move the image that you downloaded into the default folder where the system pictures are stored in Linux. It’s located at:
/usr/share/backgrounds
- Open up Terminal (Shortcut: Ctrl + Alt + T) and then launch Nautilus, which is Ubuntu’s default & pre-installed file manager as an admin:
sudo nautilus
sudo stands for “Super User do” which basically means do something as a Super User. In Linux, Super User is a synonym for Admin (Root).
- This will require you to re-enter your account password. No visual feedback is provided when you enter the password. After you’ve entered your password, hit enter.

- Nautilus will open as Root (Admin).
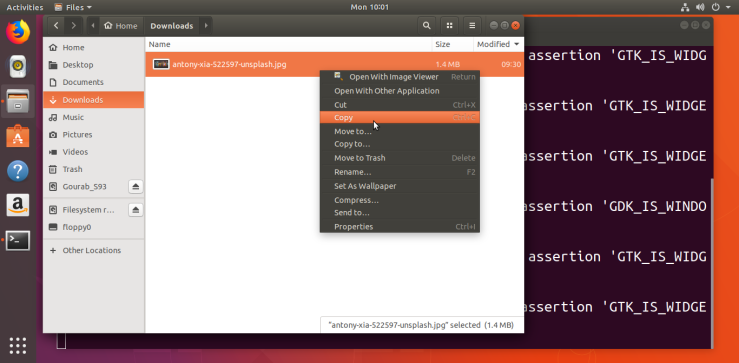
- Navigate to where you downloaded that image. Generally its saved in “Downloads”. Right – click on the image & click on Copy (or Ctrl + C) to copy the pic.
- Next click on your Root directory, the 1st one after the separator, or after the Trash, (or if you have inserted a removable disk, the 1st one after it. This is the case here.) Here it appears as “Filesystem root”, on the left panel. Click on it and scroll down towards the bottom on the right hand panel of Nautilus.
- You’ll find the
usr
folder. Double click it and go to
share
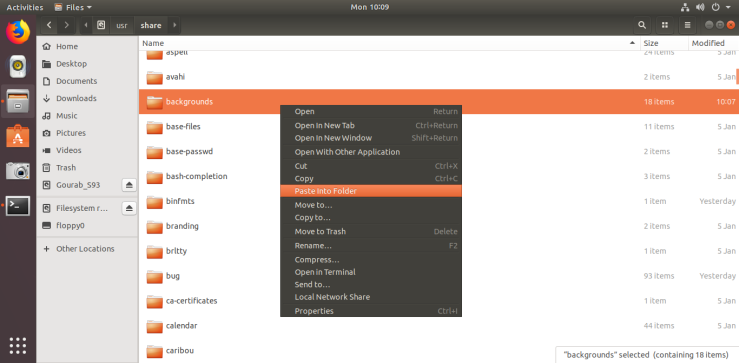
Find
backgrounds
here and right click it & select “Paste into folder”. Or simply open
backgrounds
and press Ctrl + V to paste the image.
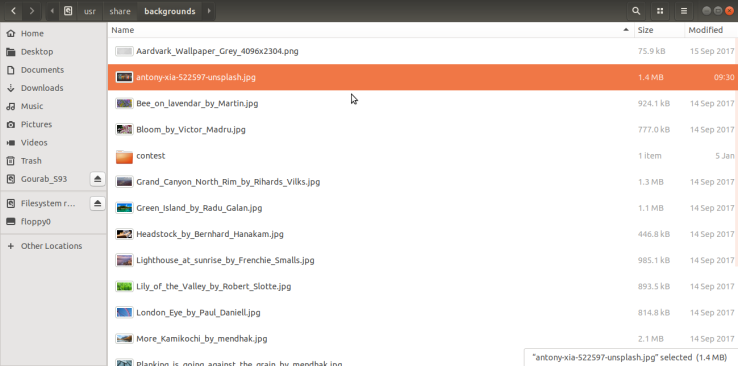
- Your image will appear in the “Backgrounds” folder.
- Now go to Terminal & enter Ctrl + C to close the Nautilus (Admin) window. If you’re new to Linux, ignore any warning(s) on the Terminal that you see. A copy operation is always done right if you followed the steps. Close the Terminal.
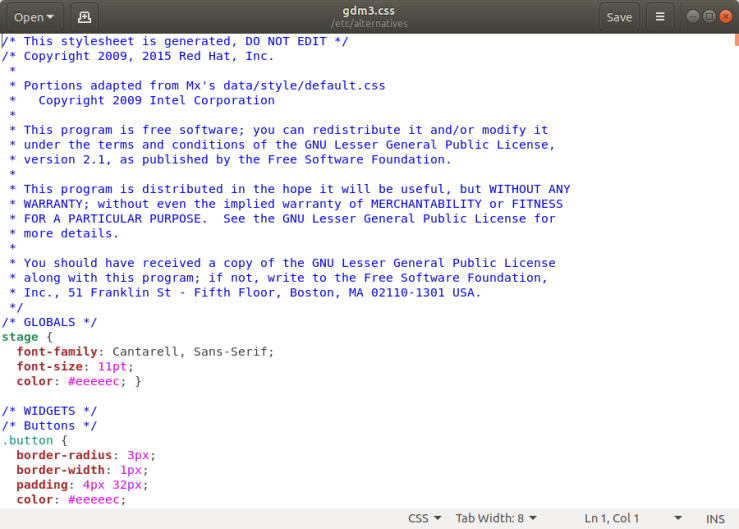
- Now we have to edit the main CSS file that actually controls how the login background looks:
CSS stands for Cascading Style Sheets. That means the login background that you see is actually an image with various types of formatting, design & items added on it. This is done with the help of CSS. You can learn more here.
- Open terminal (Ctrl+Alt+T) and run the command:
xhost +local: && sudo gedit /etc/alternatives/gdm3.css
This command is used to edit the file at /etc/alternatives/gdm3.css, which in turn is linked to /usr/share/gnome-shell/theme/gdm3.css
- You’ll be prompted for password. Enter it. Remember there’s no visual feedback while entering your password and hit enter. The file will open:

- Click on the
 (Hamburger menu), click on “Find” option and enter:
#lockDialogGroup
as the search query.
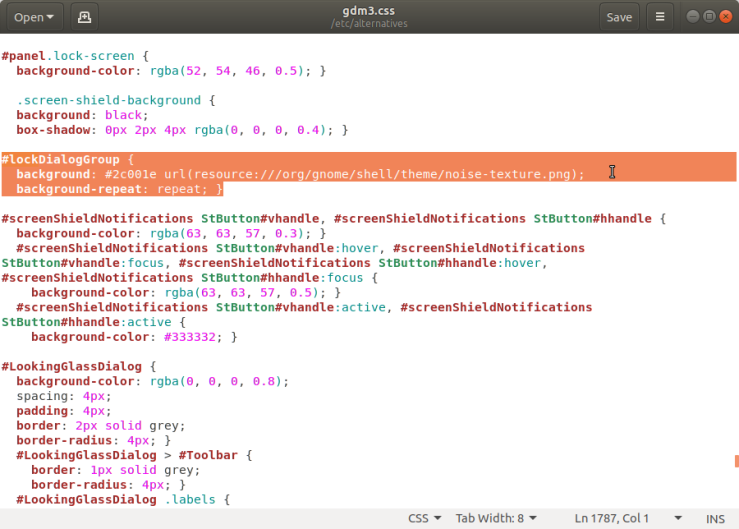
- Then edit the lines into:
#lockDialogGroup {
 background: #2c001e url(file:///usr/share/backgrounds/antony-xia-522597-unsplash.jpg);
 background-repeat: no-repeat;
 background-size: cover;
 background-position: center; }

Replace:
antony-xia-522597-unsplash.jpg
with:
Your_image_name.jpg/png
- Save the file. Close the editor.
- Enter Ctrl + C in the Terminal to close the editing of the gdm3.css file.
Phew! That did it, probably. Wanna be sure? Just restart your PC to see the changes.
Awesome, right? If you have doubts anywhere, or face a problem, feel free to let me know in the comments. Also, like & share with your friends, colleagues & people who are tired of the old boring & dull login screen.
Peace.
Article published on: 10 - Apr - 2018, 12:29 AM IST
